Photoshop Essential Tools - Selection Tools
Tool choices can be like preferences in that different users will find some tools more useful than others depending on how they like to work. There are a lot of tools to choose from and not all of them are essential for photography work. This article is simply a suggestion of what tools you may want to start with and as you gain experience you can add others. Many tools do similar things but in different ways, and there are always many different ways to do things in Photoshop. First we will explore the Selection Tools.
The toolbar itself has a set of double arrows at the top. These simply change the toolbar to a single or a double column. Use which one suits your screen layout. The single column takes up less horizontal space and works well for most users. Nearly all of the tools have a small arrow at the bottom right edge indicating additional tools are available with the same shortcut. If you right click on a tool icon the other optional tools will appear. Once you get a sense of the tools you want to use you can modify the Toolbar under the Edit menu to remove tools from the toolbar and simplify the interface. We will not do that immediately as we first need to see what is available.
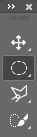
The top section is the Move Tool (V). Its purpose is simply to allow you move a layer, selection or mask. It is also a fairly safe tool to have active to avoid accidentally doing something unintentional with a painting or cloning tool. It does have some options, the most important is the checkbox in the options bar to auto select a layer or group (layers that are linked together). It is on by default which I find less than useful. When graphics people are compositing text and graphics they like to have auto select on so they can point the mouse at an object and move it without having to deal with the layers panel. That is less useful for photographers, and sometimes can choose something you do not expect. Turn it off to gain control over what changes. The alternate tool here is the Artboard tool which is of little value to photographers and the first I would move to the Extra Tools section.
A side note: when dealing with layers and masks - they are normally linked together and will move together. They can be unlinked so that they can be dealt with individually. For example a mask might select an area and the layer may contain information like a texture that you may want to move independently while leaving the mask in place. Sky replacements would be an example of when this is valuable.
Marquee Tools
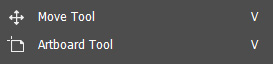
The second section is the Marquee Tool (M) which has two useful options. The default is a rectangular marquee and the option is the elliptical marquee. There are also single row and single column selection options which are less useful and can be removed.
In the options bar there are several options to be aware of. The first highlighted icon indicates that a simple marquee is being selected which is the default. The second icon is Add to Selection which means that if you draw another marquee it will add to the selected area rather than replacing the previous marquee. This is the same as adding the Shift key as you draw another marquee. The third icon is to Subtract from the active selection which can also be accessed by holding the Alt [Option ] key as you select. Adding the Shift key to the Alt [Option} key is the shortcut for the last icon which is the Intersect option. When more than one selected area are created with the Intersect option the only area that remains selected is where they overlap (intersect).

Next in the option bar is the option to Feather the edge of the selection. Initially the selection will be a hard edge where the pixels are either selected or ignored. A Feathered selection softens the selection by making a transition between the selected and non-selected areas. The problem with Feathering is that it is an arbitrary number and the effect changes with the image resolution. You are making a selection which will most likely be used on a mask or shown with the Quick Mask option (see the article on the Quick Mask). It is much more precise and useful to learn to apply blurring to the mask than to use an arbitrary feather setting. There are times when you can determine a blur in an initial image mask and wish to apply a similar selection using an Action. In that case a Feather could be applied in the Action to repeat the blur effect.

Other options include the Style setting, which can be Normal, Fixed Ratio or Fixed Size. In normal mode the selection can be made by simply dragging the cursor over the area to be selected. Imposing a fixed ratio to the selection does not restrict how big you draw, but keeps the relationship between the vertical and horizontal dimensions to specific parameters of width vs. height. Fixed size obviously sets up a selection of a specific number of pixels in either direction. The last option is the Select and Mask button which opens a new Workspace designed to make selections easier to deal with. This will be dealt with in a separate article.
With the rectangular marquee you will notice the anti-alias option is not available. It will appear if you choose the Elliptical Marquee. In Photoshop you are dealing with square pixels, so a rectangular marquee will line up perfectly with the edges of a selection. With an elliptical marquee you are dealing with curved shapes which will result in visible steps along the edges of the curve based on the square pixels. Anti-aliasing is turned on by default for elliptical marquees and the effect is to blend the pixels into a smoother transition.
Lasso Tools
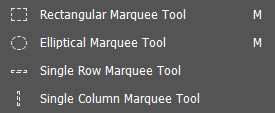
The Lasso Tools (L)include the Lasso tool which draws free-form selections, the Polygonal Lasso Tool which draws straight line selections from point to point, and the Magnetic Lasso Tool which attempts to follow edges of a subject. The success of the Magnetic Lasso Tool depends on many things including the image resolution and the difference in tonal values along the edges of the area you are trying to select.
The Lasso Tools share the Add, Subtract and other options including the Feathering and Anti-aliasing options and the button to access the Select and Mask workspace. One useful application of the Lasso Tool is to select and area for another selection to appear within, or to select a large area to fill in the Quick Mask mode. An example of this might be to create a loose area around your subject, invert the selection to protect the subject and apply a vignette to the area outside of the subject. This would then need to be diffused by blurring the selection in the mask.
Selection Tools
The last set of tools in the selection group are the Object Selection Tool (W) the Quick Selection Tool (W) and the Magic Wand Tool (W). Selection tools rely on mathematical differences within the image, so their accuracy can be limited if the image has low contrast. Low contrast can mean minimal differences in luminosity contrast which would make edges less well defined. Low contrast in color would mean that similar colors may be selected which is controlled in the "tolerance" setting of the Magic Wand tool.
The Object Selection tool is similar to the Select Subject button except you can restrict the selection to a specific area of the image to refine the selection. Select Subject uses the entire image as a source. So, the Object Selection tool essentially pre-selects an area in which the subject may be found.

The default is a rectangular selection which you draw over the area to be considered. A Lasso option would allow you to make a freeform selection of an area. Enhance Edge attempts to smooth the selection but the results are minimal so it is best left off. Use the Shift key to add to an area and the Alt [Option] key to subtract from it. The Object Subtract checkbox is a bit confusing. By default if you use the Alt [Option] key to subtract with the checkbox on (default) the area will be analyzed and a portion deleted which is likely what you want. Unchecking the box simply makes the entire area highlighted disappear from the selection.

The Magic Wand is best at selecting by color. It uses the same Add, Subtract and Intersect options as the previous tools. The Sample Size box is similar to the one used in the Eyedropper tool and lets you tell Photoshop how many pixels around the one under the cursor to consider when making the selection. The Tolerance number is the number of values in each of the color channels beyond the values in the selection to include in the consideration. Lower numbers make the selection more restricted. An anti-alias option in included. The Contiguous checkbox tells Photoshop whether or not to consider pixels beyond an edge or border or to remain within the selected area. Sample All Layers allows you to include Layers where you may have modified the image colors to be included in the consideration.
I generally find that Sample All Layers is not the best option. An alternative to that would be to create a temporary merged visible layer, make your selection, and then delete the merged layer. This eliminates possible confusion as you are sampling from the known current status of the image. Another alternative for selecting by color is not a tool, but the Color Range option in the Select menu. That will be covered in a separate article as well.

The Quick Selection tool is best at selecting by area. It uses a different set of icons but the Add and Subtract functions are the same. There is no Intersect option. Instead of a Sample Size option there is the ability to set the size of the cursor, the hardness and the spacing to use when drawing on the image to select an area. The brush angle setting would only apply if you modified the shape of the brush to an ellipse. The Sample All Layers option is included. The Enhance Edge option attempts to refine the selection as image edges are detected. Unlike other selection tools the Quick Selection tool automatically changes to the Add to Selection mode. The Alt [Option} key can be used to delete from the selection. Modifications to the size and hardness of the brush may affect the selection made.