Lightroom Overview - Part II
Importing Files
Importing images is done with the Import dialog accessible from the Library module. The source, such as a card reader or a hard drive folder will be listed in the left panel, and destination options on the right. In most cases the Add option is the best choice if the file is already on your computer. Remember that you are adding images to the database, not changing the location of the source images on the drive. Adding images simply references the images so that Lightroom can manage the files. Again, think of a card catalog. You are adding the images to the database, not actually copying the file itself which should be imported to the hard drive.
Other options include Copy as DNG, Copy, and Move. Copy as DNG adds the images to the database and converts the raw file to the Adobe DNG format. Copy allows you to copy images to a new location at the same time as you are adding them to the database. Move deletes the images from the source location after moving them and adding to the catalog. I think this is a risky option. I would prefer to delete files from the original source after confirming that they are in the destination location. A destination for the files is part of the options. The DNG format introduces slight non-destructive compression to the raw file. Changes to a DNG image are recorded as modifications to the metadata rather than to an external XMP file.The primary intention of DNG is to preserve the viability of a raw image in the event that the original proprietary file cannot be accessed. There is no harm in using the DNG format, but I fail to see the advantages.

Images can be imported from your hard drive or directly from a memory card. I do not recommend importing images by plugging the camera into the computer. You should use a card reader. Importing does not copy your images. There are no images in Lightroom, only references to images that are somewhere else in your system. That can be your primary hard drive or an external hard drive. Deleting a Lightroom catalog will not remove your images, but will remove the metadata stored about processing your images unless you exported that data to the XMP files stored with the raw files. Exporting Lightroom edits to XMP files will allow you to retain any edits if you delete a catalog.
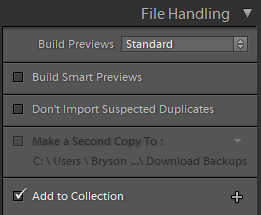
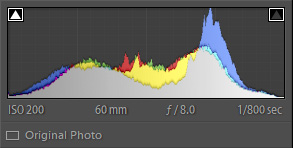
When importing images the right panel has options for file handling including building Smart Previews. Smart Previews are reduced size copies of the files that can be edited even if the original file cannot be accessed. The real use for them is to be able to process files while away from your primary computer or the storage device, such as traveling with a laptop. If you only work on a desktop computer they are not of much value and they do take up space. The little box below the histogram below says Original Photo. That would change if a Smart Preview were also available.
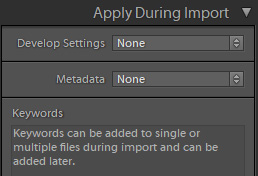
When importing it is possible to add the images to a collection and to add keywords to the images. These are organizational aids and what you do depends on your intentions. Keywords can be added to multiple imported photos at once. More specific keywording can be done to subsets and individual images from the library.
Collections

Collections in Lightroom are an additional organizational tool. Lightroom can automatically find files based on the metadata such as the date shot, aperture, camera model, etc. Keywording allows you to apply specific information to a file or files, but a collection is simply like a subfolder. Smart collections automatically add or remove images based on a filter you apply to an image. A filter might be a star setting or a keyword. Regular collections are populated by images you choose to include. Smart collections include subcategories that can be helpful. They will contain files you tagged with a color or star setting. They will also contain collections based on recently modified files, files without keywords and other useful information. Keywording images can make finding them later an easier task. Keywords can be added during import or later in the Library module. Adding keywords to groups of files rather than individually is a more productive approach. Remember that basic image metadata is already in the file so Keywords are more like reminders of things like location names or descriptions of key elements of the images.
Histogram

Histograms show in the upper right corner of the Library and Develop modules. A histogram is a graphical representation of the values in the image file. There are 256 levels from 0 (black) on the left to 255 (white) on the right. How high the bar goes is an indication of the amount of information for a particular value. Under the histogram are metadata readouts indicating the ISO, lens focal length, aperture and shutter speed for the image.
In the Develop Module when the mouse is over the image these change to indicate specific RGB values in the image at the position of the cursor. The readout can be in RGB values in percentages or in L*a*b values. The L channel values can be useful for determining best values for the highlights and shadows. RGB values are in percentages rather than the typical 0-255 as no output color space is imposed in Lightroom. This is one of the few differences between Lightroom and ACR. ACR respects the proposed output color space in its readouts. Lightroom images only apply color space information when you export the file. There are also indicators in the upper corners for when information is "clipped", meaning it has reached its limit on either end. Clipped values are generally but not always to be avoided.