Blending Modes III - Contrast Modes
The contrast group of blend modes darkens the darker values of the image and lightens the lighter values resulting in an increase in the visual contrast of the image. The difference between the various modes is in how and to what degree the blending is done which in turn affects the intensity of the result. In all of the contrast modes the mid-tone values in the image are less affected and the degree of change is dependent on the values of either the current layer or the layer below the applied layer. If the mode is applied to a blank adjustment layer the effect is global.

The Overlay mode calculates values of the layers below the active layer and applies the Screen mode to lighter values, and the Multiply mode to darker values. While it is not the most severe of the contrast modes, it is the most useful to photographers when used as an adjustment layer applied above a pixel layer to add contrast. This image shows a 5 step grayscale. Mouse over the image to see how the darker and lighter gray steps are changed when an unadjusted Levels layer in Overlay mode is added. The black, white and mid-tone gray patches are not affected.
Soft Light mode is similar in affect to Overlay but less intense. It is not half of the effect of Overlay but is a more subtle blending of tones that is useful when Overlay is simply too heavy handed. Shadow and Highlight areas appear less dense with Soft Light.
Overlay and Soft Light modes are effective as adjustment layer modes in that they make their calculations based on the layers below rather than on the content of the active layer. It is possible to add an adjustment layer with no other modifications to that layer except the blending mode change and get the desired effect, which is what was done in the sample image. Masking can be added for local control reducing or eliminating the effect in certain areas of the image. Overlay and Soft Light modes are effective in conjunction with the High Pass filter in creating a sharpening effect which is useful in portraiture and other images where primarily edges benefit from the added contrast. See the High Pass article for a sample.
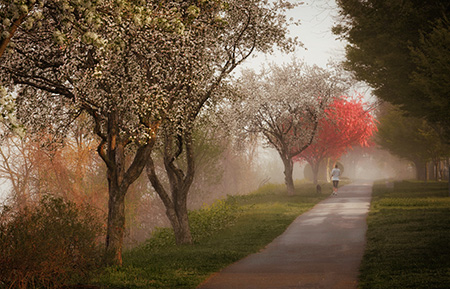
Soft Light mode is also useful as a blend mode on a blank layer for retouching. You can paint on the layer with white to dodge, black to burn, or even add color to an image in the process. While Overlay would do much the same, the more subtle Soft Light mode is more practical as the layer will likely be used at a reduced opacity as well. In the image at the right morning sun was enhanced with a color overlay.
Other members of the contrast group use different methods to calculate the contrast increases and use the current layer rather than layers below to make those calculations. The effect this has on the image can be seen when Hard Light mode is applied to a pixel layer as opposed to being used on an adjustment layer. The result of an adjustment layer in Hard Light mode is identical to Overlay, but when applied to a pixel layer in a composite the result is quite different. Now the calculations are being made on the active layer rather than the layers below as the mode is intended to be used to create an interaction between the layers rather than a simple increase in contrast. Vivid Light and Linear Light use the same method of calculation and are more intense than Hard Light. As adjustment layer modes they are therefore of little value to photographers, except to influence the appearance of pixel layers in composite images.
Pin Light mode has no affect at all on an adjustment layer, but has a pretty intense result when used on a pixel layer in a composite. The values of the layer and the layers below are compared, again with the concept of adding contrast so mid tone values in the active layer can disappear entirely. Darker pixels of the active layer are visible in the result when compared to pixels of lower layers, and lighter pixels remain visible compared to those in lower layers. This can be interesting as what remains in the composited image are parts of the active layer laid over the layers below in what can appear to be a rather random fashion.
Hard Mix is another rather unusual blend mode in that the results can be rather radical. In each of the RGB channels the pixels are converted to either black or white depending on their value. The composite color image therefore takes on a posterized appearance with the colors depending on the values in the image. As an adjustment layer the values are determined by the layer below, but in a composite the active layer and the lower layers combine to produce the result. The use for this is limited for photography except in an image used for an illustrative effect.
An often suggested technique for burning and dodging is to use a layer filled with 50% gray in Overlay or Soft Light. I see no difference in using a blank layer. I recommend using separate layers for burning and dodging. With a brush at low opacity the technique is superior to using the burn and dodge tools in Photoshop which cannot be used on blank layers. It is also possible to burn and dodge using simple curves adjustment layers and black masks. Painting on the masks with a low opacity white brush gets you to the same place, plus the technique has the added advantage that the curve can be modified to change the effect.