Blending Modes II - Darkening
Darkening Blend Modes
In any version of Photoshop or Elements you have access to layer modes with the default being Normal. The mode is in the drop down box at the top left of the layers panel next to the layer opacity. If we make a color or density correction to an image, the default normal mode of the layer means we influence both the luminosity and the color of the image. That is a default we can override. In this section we will describe the two members of the Darken group of blend modes used most by photographers - Multiply and Darken.
Multiply Mode
The Multiply mode mathematically multiplies the values in the current layer by those in the layers below. A typical use for this is to create an overall darkening effect to the image, which can be done with any adjustment layer without changes to the layer parameters themselves. This is then controlled with the use of the layer mask to render the effect where it is desired, and lowering the layer opacity. A vignette may be a typical effect, darkening the edges and corners of the image. The visual effect is much like that achieved by overlaying two slides in that the values of the two images reduce the transmitted light. The downside of Multiply mode for vignettes is an increase in saturation of the dominant color. In subtle vignettes this may be of little concern.
The typical use of Multiply mode is to darken an image with an adjustment layer. Adding any adjustment layer in Multiply mode Photoshop assumes you intend to use the content of the layer below as if it were the content of the adjustment layer and darkens the image in the same way as a duplicate layer in Multiply mode. This behavior is valuable in that the use of an adjustment layer without pixel content helps to keep the size of the file to a minimum and still get the desired effect. Modification can be made to the adjustment layer, but even without them the effect is applied.

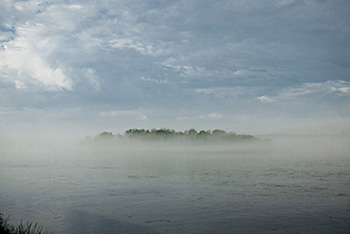
In the second image the effect is controlled with a mask excluding the clouds and the opacity of the Levels layer was reduced to blend the darkening effect to the desired value. This is a very simple image modification and often is the easiest method of simply darkening a sky, or adding a darkening vignette to an image. In addition to the blend mode itself, other modifications can be made to the adjustment layer in order to further modify the effect. Changes to the values in a Levels or Curves layer can be used to make more subtle adjustments to the layer including modifying color. A Hue and Saturation adjustment layer in Multiply mode will look just like a Levels adjustment layer with no modifications, but adding an actual hue shift or saturation adjustment can help make subtle modifications that can be very valuable. There are no "rules" to these techniques, you simply need to play with the various options afforded by your choice of adjustment layer to help you control your image.
Darken Mode
In the Darken mode the content of the layer is only applied to the image below if the content of the layer is darker than the existing content. Anything lighter in the layer is ignored. The Darken mode can be useful where an image has been processed to two different values and composited to introduce the darker processing into the lighter image. Salvaging highlight detail in light sources, or near windows would be an example of this approach. Again, masking would also be a part of controlling the effect, but the Darken blend mode would keep lighter areas of the image from having an influence, especially if the contrast of the second image were higher than the background image.
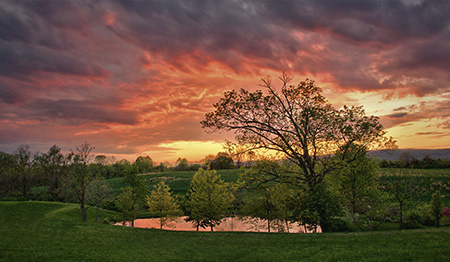
The darken blend mode is less used than Multiply and the lighten modes. Where possible it can save you from complex masking. In the image at the right you can mouse over to see the original with lighter clouds at the top. With a curves darkening of the clouds the mood of the storm breaking was enhanced.
There are other modes in the Darkening group that are generally less often used by photographers. Color Burn is darker than Multiply and tends to increase color saturation, especially in the mid-tones. Linear Burn is also darker than Multiply without the saturation increase.